Spice Centric

A fetching foodie's quest for more flavor!

Ch-ch-ch-ch-changes! January 23, 2011

Filed under: Home/Decorative — fetchingfoodie @ 7:52 pm

Ground control to Major Tom, FetchingFoodie is just about to enter her Golden Years.


…Ok, enough with the Bowie references.  Although wearing a helmet and taking protein pills might not be such a bad idea.


I am finally (eight months after graduation) moving out!  I landed a full-time job at an awesome, young company in Chicago.  And because I hate how long my commute will be, I’ve gotta move ASAP.  This means that for the next month or two, Spice Centric is going to take a hit.  (And yeah, it’s gonna hurt.)  In my excitement, I decided to head to the thrift store to purchase some much needed  items.  (Side story: My grandmother calls the thrift store “the Junk Store.”  But once you take a look at these things, I know you’ll agree that it should really be called the “Buried Treasure Store!”) I have a lot of stuff from college, but not everything I’ll need.  I just had to share my super-cute finds:
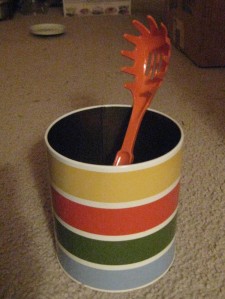


Great orange spaghetti spoon (45 cents) with this coffee-can sized canister ($1.50).  I think I’ll use it for kitchen utensils, but it did come with a lid.  I was thinking of storing tea in it too.
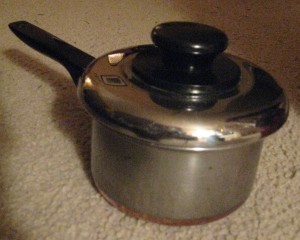


Now this sucker was one of my more expensive items. $4, but totally worth it.  I am in love with copper-bottom pots.  I can fully admit that it’s a sentimental thing (my grandmother has a great set, and I used to love to polish the bottoms!), but because my grandma has them, I know they must be the best.  You just don’t argue with Grandma.
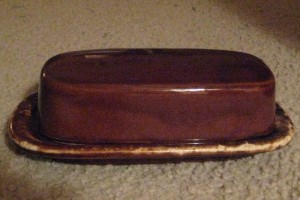


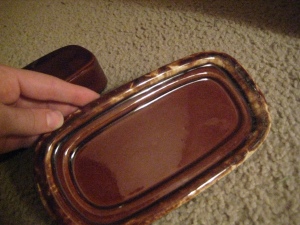
So, this great butter tray/cover ($2.50) is PERFECT. It was part of a set, but I really didn’t need any more mugs. …You now that I have perfectly retro tastes, and I will not deny this in the slightest.  I’m really looking forward to an eclectic apartment.
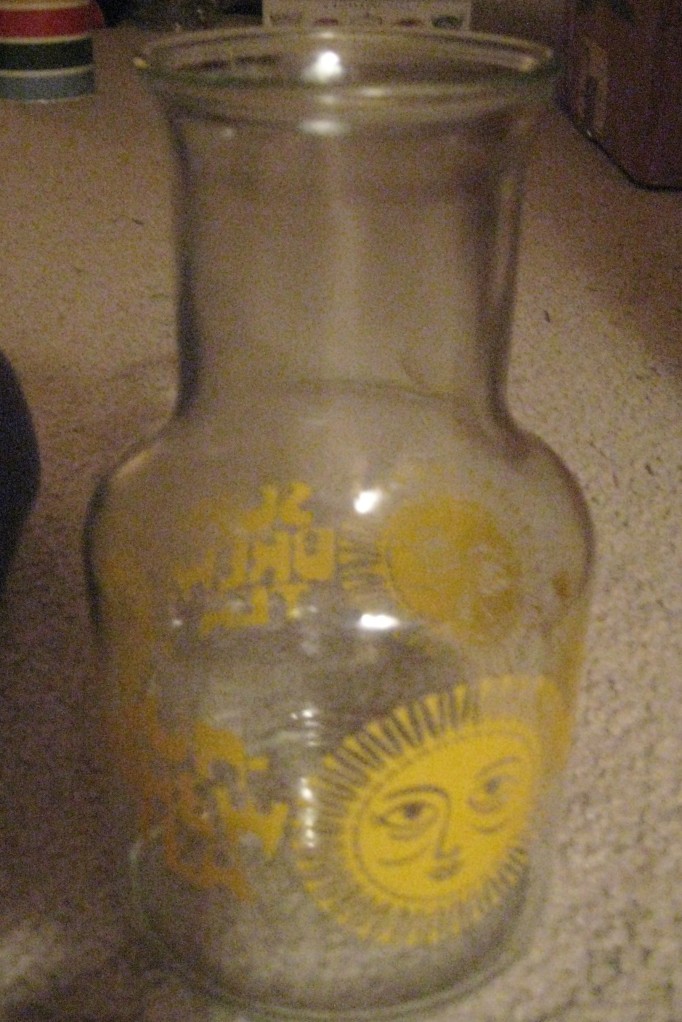
 

Alright, I’m in love with this thing, too.  Did I really need a pitcher (65 cents)? Maybe not.  But hey, look at this thing!  I can put fresh-cut flowers in it, or even my iced tea.  (By the way, sun tea is terrible for you.  The temperature that the water gets to is actually optimal for bacteria growth.  So I suggest making iced tea or good ol’ fashion refrigerator tea.)


The following items aren’t for my kitchen, but still deserve a shout-out:


The picture quality may not be great, but this find totally is.  Whales are my most favorite animals ever.  They are grand and majestic, and stylized versions of them are quite adorable.  This is actually a piggy bank (65 cents).  Functional knick-knacks are fantastic.  You can’t tell from my poor picture quality, but this guy is fuzzy to the touch.  I will love him forever and always.


This last find was one I almost didn’t buy.  It was $5, and I usually won’t spend more than $4.  I liked the colors, and it’s fairly large.  Because my new company is super cool and casual, I thought it’d be a perfect tote for work and my computer.  When I got home, I decided to look up this brand I had never heard of.  That’s right, I saved $55 on this sucker.  I’m awesome. But not as awesome as I want to be.  Some kids beat me to the entire original Star Wars trilogy on laser disc.  The covers would have looked great on my wall.


…For those of you keeping track, I spent under $14.  Perfect.  Although, no more $5 things in the future.


I still have a thrift store wishlist (stock pot w/ lid, colander, cast-iron skillet, bookends, a wooden spoon or two, and some sort of novelty tin for a garbage can), so more trips to the labyrinth that is the thrift store are on their way!

 

I am a criminal. January 12, 2011

Filed under: Recipes — fetchingfoodie @ 4:58 pm

…or at least a big, fat stealer.  The following recipe is one I adapted from La Petite Chef.  (Find it here.)

So the holidays are over.  You’re kind of missing that rush of baking delicious sweets (and then eating them), wondering what to do about most of a whole nutmeg left over from the two glasses of eggnog you actually served, and now it’s time to start that New Year’s health regimen.

…Now why can’t you take care of these all at the same time?

I found this delicious recipe, and with a few small changes, I think it may be your answer.  Ok, you may need to sit down to prepare yourself for the name because it will shock you.  But then you’ll make it and– prepare yourself again– it will amaze you.

Chocolate Hummus


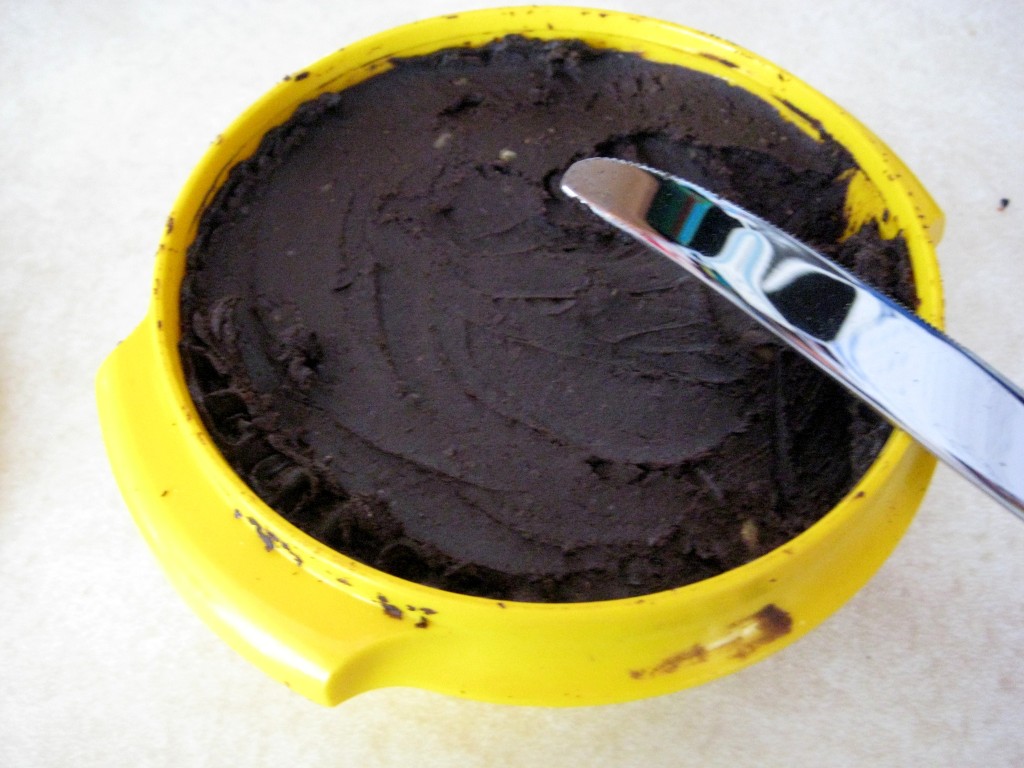
I know how it sounds.  But I promise you, this is a GREAT way to satisfy your sweet tooth, chocolate cravings, and actually work in some nutrients!  Instead of chocolate hummus, think of it more like a healthy version of Nutella (R) .  And don’t let their commercials fool you.  Nutella has quite a bit of sugar per serving; not really the best way to start off your morning if you like to spread it on toast.

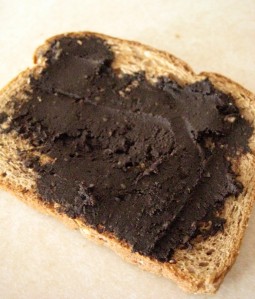
So instead, try the chocolate hummus!  Spread it on whole grain bread, mix it into your morning oatmeal, use it as frosting for delicious and healthy muffins!  If you already like to eat Nutella in the morning, between the peanut butter and chickpeas, you’re starting your day right with a nice serving of protein.  I “healthed-up” my version of the recipe by switching granulated sugar to agave nectar or honey.  Both of these are sweeter than sugar, so you can use less.  Because they are thick liquids, it also allows you to use less oil.  The consistency is closer to a paste than that of Nutella, so don’t be alarmed.  While La Petite Chef just happened to use dark chocolate powder, I made sure to use it, as this also has added health benefits.  If you’re not so into the dark chocolate, you can use a quarter cup of dark chocolate power and a quarter cup dutch process.  The nutmeg will not only brighten up the flavor, but it is also believed to be an anti-inflammatory.  If you are super-concerned about your sugar intake, you can swap the nutmeg out with cinnamon, which is believed to help lower blood sugar.  Or you can use both! 🙂

You will need:

  • 1     can   Chickpeas (15 oz.)

  • 6     TB.    Peanut Butter (Pick the peanut butter with the fewest ingredients. Mine just has one: peanuts!)

  • 4     tsp.   Olive Oil

  • 1/2 c.      Dark Cocoa Powder

  • scant  1/3 c.      Agave Nectar or Honey (agave makes it a little more spreadable)
  • 1     tsp.   Instant Coffee Powder

  • 1     tsp.    Vanilla Extract

    1/2 tsp.   Freshly ground nutmeg

  • 1/2 tsp.   Salt

  • 3-5 TB.    Water

Using a food processor (or your own patience and blender), bix/blend together all ingredients except the water.  Take your time to scrape down the sides well, and continue to mix.  Add one tablespoon of water at a time while the processor is running.  If you are using a blender, do your best to stir the water in a bit while the blender is off before blending again.  I used only 3 tablespoons of water, but I like the thicker consistency.

Viola!  Store it in an airtight container in your refrigerator.  It makes about the amount of a normal size Nutella jar.  Obviously I used a blender as I still don’t have a food processor.  (I know, I know.  How?)  Well, don’t fret.  Because hummus (of any kind) is so thick, the blender actually started to smoke this time.  We said “good riddance”  as it’s from about 1985.   But if you like your blender, be warned!  I doubt it will have this problem.  I’ve made hummus in my blender before.  I believe it was just on its last leg.

So please, leave your comments and questions below!


Original Banana Bread December 30, 2010

Filed under: Recipes — fetchingfoodie @ 8:09 pm
Tags: , , , , , , ,

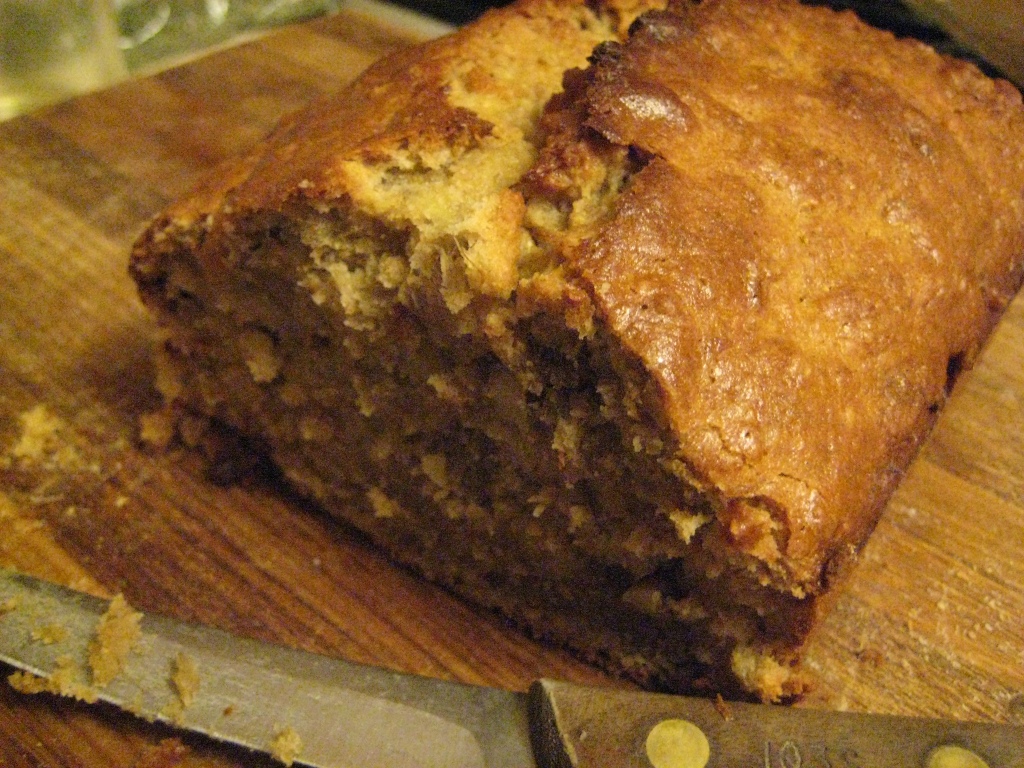
This banana bread recipe is my own creation.  It’s very moist and rich, so you don’t even need to butter your slices!

I primarily use Penzey’s spices.  They’re super good to their customers.  I’m lucky; I have a store near me.  But the one time I ordered from their online catalog, I received a free small jar of their newest herb blend.  You can order their catalog  for free.  It includes many recipes in each issue that are sent in by readers and tested in the Penzey’s kitchen.  Most issues will contain a coupon for their new free spice.  Not bad.

The baking spice in this recipe is a blend of Ceylon cinnamon (a very citrus-y taste), anise, mace, and cardamom.  Cardamom is like my secret ingredient for dense, fruit-infused baked goods.  The baking spice blend is very fresh and fruity.  It compliments that deep banana flavor perfectly.  If you don’t have baking spice on hand, 1/4 of a teaspoon each of ground anise, mace, and cardamom + 1/2 tsp. ground cinnamon will do.  It adds a little more spice, but that should be ok.  If you find your cinnamon is a little dull-tasting (maybe you bought it in bulk 15 years ago… like my family), try adding a 1/4 tsp. of orange zest to liven it up.

Ooey-gooey and delicious.

You will need:

  • 3-4 Large, overripe bananas
  • 1 cup granulated sugar
  • 1 cup whole wheat flour
  • 1 cup unbleached all-purpose flour (I prefer King Arthur Flour)
  • 1/3 cup oats (I used quick oats)
  • 1 tsp. salt
  • 1 tsp. baking soda
  • 1 tsp. Penzey’s baking spice blend
  • 1/4 cup + 2 Tbl. olive oil
  • 2 large eggs
  • 1 tsp. pure vanilla extract*
  • (semi-)optional: 2/3 cup walnuts

Preheat your oven to 350(F).  Grease and flour a loaf pan.  Blend the bananas and sugar until well-incorporated.  In a separate bowl, whisk together all dry ingredients.  Add the olive oil, eggs, and vanilla extract to the banana/sugar mix.  Beat on medium speed until blended.  Slowly add the dry ingredients.  Fold in the walnuts.  Pour the mixture evenly into the loaf pan and bake 70-80 minutes until toothpick inserted into the center comes out clean.  The edges will be a dark brown.

I like to let the loaf cool in the pan for about five minutes, and then take it out to cool on a wire rack.  You can slice into it right away, but be warned… it will be a little crumbly!  You may not think it, but this little 105 pound thing can not wait for a slice!

*I will have a whole post on why artificial vanillin (imitation vanilla) is unacceptable.  Another mantra: Always choose flavor first!


Clove-Studded Oranges December 23, 2010

Filed under: Home/Decorative — fetchingfoodie @ 7:06 pm
Tags: , , , , , , , , , , , , ,

I love old traditions.  I love nice smells.  I love Christmas.  I love the way clove-studded ham looks, but I don’t eat ham.  Put all four together, and we get clove-studded oranges.

This tradition goes back to the Victorian age.  Clove-studded oranges were used as a sort of mothball alternative.  Stud an entire orange with cloves 1/4″ apart, put in a paper bag along with some ground nutmeg and cinnamon, store in a warm, dry place, and within a week or so you’ll have your very own closet air freshener.  The orange shrivels up and you have what looks like a ball of cloves.  Just one of these can be used for an entire season.

I like making the pretty kind, though, meant to be seen and smelled by all who enter your home.  You can make one to hang on your Christmas tree, or if you have a lot of time and patience, you can make several.  Put them in a bowl on your table.  I had lots of other baking projects for the holidays, so I just made one.    A bowlful would have been quite nice, though!

You will need:

  • Orange
  • Whole Cloves (purchased in bulk)
  • a size 1 knitting needle (I used a cable needle)
  • a flexible ruler (or you can eyeball it)
  • masking tape or band aids

First, decide on a pattern.  I have seen many variations.  You can cover your orange with cloves, you can make horizontal or vertical rings, a swirl from top to bottom (like a barbershop pole), just be creative!  I decided to make two vertical rings that intersected at the top and bottom.   You can sketch on your pattern with a pencil at this time if you like to line it up just right.

Next, use your knitting needle (or similar tool) to poke holes along your pattern.  Push the needle completely through the rind, but stop once you hit the fruit.   If covering your oranges completely, they can be up to 1/3″ apart.  Otherwise they should be 1/4″ apart.  The flexible ruler can help you to be precise.  Just do one part of your pattern at a time.  If you poke all your holes first, the juice will start to leak, and your hands will get sticky.

This is the fun/tricky part.  Put band aids or masking tape around the index finger and thumb on your dominant hand.  Carefully push a clove into each of your holes.  Try not to push right on the head of the clove, as they are fairly delicate and can break.  If this happens once or twice, don’t worry about replacing the cloves.

Story time: My grandmother who taught me to knit and sew always shares with me the motto: Anything worth doing is worth doing right.  While I completely agree, I would drive myself insane checking and rechecking my work.  You pretty much just have to gauge your mistakes for yourself.  That’s what my grandmother seems to do, anyway.  We’re not Amish at all, but she likes to remind me (when I twist a cable too soon on my scarves) that the Amish make mistakes on purpose to remind them that only God is perfect.  While her intent was to give me an excuse, I like to incorporate mistakes in all my hand-made work to say “See! I made it myself!”  Imperfections give a piece character.


Now, back to cloves…

Once each of your sections is complete, decide where your orange will go.  I wrapped mine in ribbon to be hung.  It lasted a little over three weeks before the mold started.  It really is a beautiful looking and smelling addition to your home for the holidays!


Welcome! December 8, 2010

Filed under: backstory — fetchingfoodie @ 9:40 pm
Tags: , , , , , , , ,

Hi everyone!  First post ever, here we go!


I love making things, especially if I get to eat them later.  I grew up with a mom who wasn’t always the most daring cook.  A signature dish I vividly remember included pasty mashed potatoes, ground turkey, and green beans from a can.  Not something that necessarily made you want to eat.  I also have a memory of my dad eating a dog treat to try and prove to me that it was safe.  He was probably still hungry because my mom had made her infamous ground turkey that night.  Ok, you get the idea.

Because of my negative experiences with food in my early years, I decided to become a vegetarian at the age of 16.  To be honest, this really didn’t help much.  Sure I got to eat a lot more raw vegetables (I’m really big on texture), but I lived in a far western suburb of the great City of Chicago.  Going “out” to eat meant going to any of a number of sit-down, chain restaurants where you would inevitably order a dish that tasted like it came from any chain restaurant.

When I went to college, I dated a guy from a suburb that boasted many locally-owned, ethnic restaurants, had family living in downtown Chicago who loved trying new restaurants, and his family happened to be chock-full of excellent cooks.  He, therefore, liked adored food and did a magnificent job showing me the ropes.  All this new food had one thing in common that had obviously been missing from my family’s dinners: flavor! While the relationship didn’t last, it sparked a love affair with food and all things that made my taste-buds dance.

When I moved into my first apartment with my very own kitchen, I decided I would learn how to bake pies.  I have always loved a good challenge, and baking a good pie crust promised to be one.  I didn’t love fruit pies growing up.  I was more of a custard fan, myself.  Still, who doesn’t want to be able to bake the perfect apple pie?  There were three keys to this mystery of pie-making that I struggled with for a long time: the crust, the type of apple, and the spices.  (Sugar is sugar, and although you may have to mess around a little with the quantities, it will pretty much always taste nice and sweet.)  From the apple pie, I branched out to other pies, and then to other baked goods (not from a box).

Every ingredient counts, but I found the quality of the spices, herbs, and extracts to be the determining factor for my food’s flourishing or flopping.   So join me here on my journey to find the best spices, herbs, and extracts, and all the different ways to use them!